Tuesday, January 27, 2009
Tutorial Autodesk Inventor Membuat variasi ukuran pada part dengan spreadsheet (iPart)
Saturday, January 24, 2009
Tutorial Inventor : memberi ukuran pada part dengan persamaan
1. tinggi = x satuan
2. lebar flange = x/2 satuan
3. tebal flange & web adalah sama = x/20 satuan
Alur kerja nya adalah:
1. Buat sketch
2. Constraints = Equal
3. Ubah nama Parameters
4. Buat persamaan / Equation
Thursday, January 22, 2009
Sekilas tentang sertifikasi SolidWorks
Sertifikasi untuk program SolidWorks, diantaranya:
- Certified SolidWorks Associate (CSWA)
- Certified SolidWorks Professional - Core Solid Modeling Specialist (CSWPCORE)
- Certified SolidWorks Professional - Advanced COSMOSWorks Designer Specialist (CSWPCDES)
Informasi selengkapnya bisa di lihat di: www.solidworks.com
Termasuk harga dan prosedur untuk test online.
Untuk contoh soal test CSWA bisa di cari di google atau http://agus-fikri.blogspot.com/2008/07/certified-solidworks-associate-cswa.html
Friday, January 16, 2009
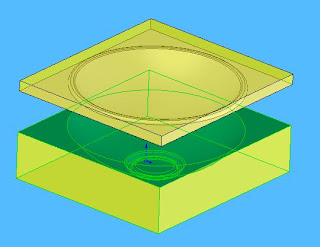
Tutorial SolidWorks : Membuat Core dan Cavity sederhana.
1. membuat model “mangkok”.
2. mengecek draft menggunakan Draft Analysis.
3. Scale tool.
4. membuat parting lines.
5. membuat parting surfaces.
6. Tooling split
7. Menggeser Core dari Cavity.
8. Memperbaiki penampakan dari Mold.
9. Membuat Assembly dari file Part Multi Bodies.
Tuesday, January 6, 2009
Tutorial SolidWorks : Feature Draft.
Tutorial SolidWorks : Feature Draft.
Dalam tutorial ini akan di jelaskan feature Draft. Untuk membuat produk plastik dengan mesin injeksi molding, diperlukan beberapa sisi produk yang agak meruncing, agar ketika cetakan (mold) membuka, produk dapat lepas dari cetakan dengan mudah.
Silakan Download file PDF di sini.
Monday, January 5, 2009
Tutorial SolidWorks : Text pada bidang lengkung
Jawaban dari pertanyaan Rejaul
Pertanyaan:
Rejaul asslmkm mas fikri, Slm knal.. mau tnya gmn cara merubah backgound gbr autocad ketika di render or pas dibuat animation tdk hitam backgound ny. Makasi
Jawaban:
Cara singkatnya adalah sebagai berikut:
- klik menu browser > View > Named Views…
- kotak dialog View manager akan terbuka > klik tombol New
- kotak dialog New View / Shot properties akan terbuka > di tab Background pilih image > klik Browse (pilih Image) > OK > OK
- selesai.
- sekarang di coba , Menu Browser > View > Render > Render.
Selengkapnya seperti ini:
1. Click Menu Browser ![]()
![]() View menu
View menu ![]() Named Views.At the command prompt, enter view.
Named Views.At the command prompt, enter view.
2. In the View Manager, click the view name you want to change. If the view isn’t already displayed, expand the appropriate View list, and then click a view name.
3. In the Properties panel, click the Background Override field.
4. Select Image from the Background Override drop-down list.
5. In the Background dialog box, click Browse and specify the image for the background.
6. Click Adjust Image.
7. In the Adjust Background Image dialog box, specify the desired options for the image.
§ Specify the position for the image by choosing an option from the Image Position drop-down list.
§ Click Offset or Scale to adjust what functionality the sliders have.
§ Click Maintain Aspect Ratio When Scaling to have the image scale uniformily.
§ Drag the sliders to adjust the offset or scale of the image based on the current setting.
8. In the Adjust Background Image dialog box, click OK.
9. In the Background dialog box, click OK.
10. In the View Manager, click Set Current.
11. Click OK.


